Thursday, July 21, 2016

Self-Made Speech Bubbles

Hello Crafty World!!!
I am been having a fabulous time creating. One of them has been with my Brother Scan n Cut. I recently used the canvas free online software to create some designs. One of them was Speech Bubbles. You can see the Vee-dio on my YouTube Channel.

After filming, I cut out some images and created some cards. I used all but one of the bubbles. I can still use it on a colored or printed card as it is the white base layer.

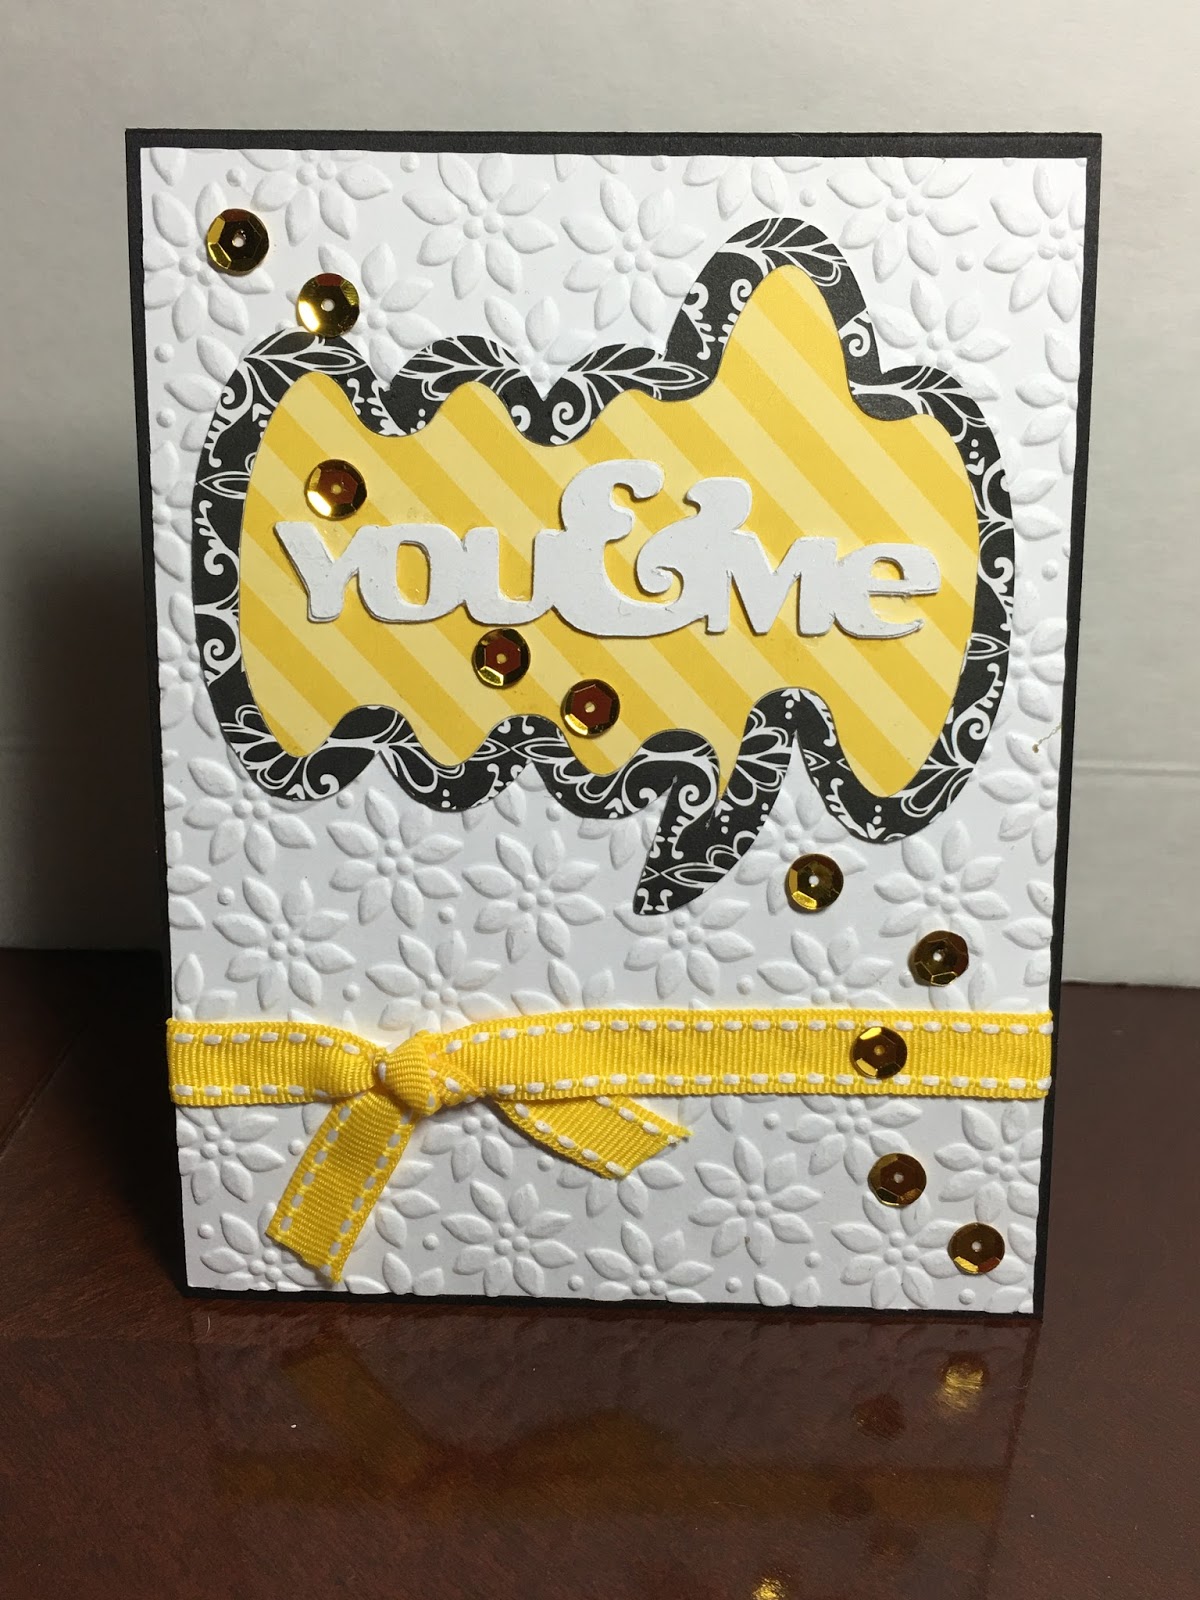
Out of them all this one was my favorite and was the one with the incomplete cut. I disguised it with the Heartfelt flowers that were cut in white and inked with distress inks and shimmered with some of the Tattered Angels Shimmer Water Color paint. 


I also used it to paint some of the embossed flowers on the card. I used green to go around the edges in order to get a bit of contrast between it and the white card background Simple, simple, simple. The gems are from Prima.

These two are on a black base A2 top folding card. Since I stayed in the same color family I could use similar embellishments on both cards.The sequins are from a Dollar Tree set.

There is a bit of glimmer on the You & Me.


This final one is in my eyes a fail. The concept did not work. I colored the words using the Tattered Angels Water Color paint and the white base layer. Once finished I felt it needed more white. So I used the Tim Holtz White Enamel and nope. Kept covering it and it just went from bad to worse. 


I think I will cut the words again and glue it on top of the enamel coating and give it a popped-up look. Only way to know if it will work is to try it.

The Vee-dio for the cards can also be found on my YouTube channel.

Thanks for stopping by today. Keep inking in the name of love.
Until then.

Sunday, March 27, 2016

Happy Ressurection Sunday

He is Risen!!!! 
Praise God from whom all blessings flow. I count it all joy to find myself once again in the land of the living. The Lord decided that he is not through with me yet.

I made some cards for Easter and could not decide what I wanted to do. I had an idea floating around in my head, but was having trouble bringing it to paper. This is what I finally decided upon.


The sentiment is laser printed and foiled with the Anna Griffin silver foil. I used the Minc machine for the transfer. 

The oval outline is Graphic 45. I cut out the icon using my Brother Scan n Cut. The cross is from Spellbinders and I used some of the Dollar Tree Jot Foil and Holographic paper for the outline. The silver is Bazzil. Flowers were formed using Heartfelt Creations Botanical Rose and inked with Distress Inks. The blue behind the white label is actually a striped white-washed sheet of paper from GCD Spring All Over (LUV their papers!). Centers of flowers are Queen and Company. The white ones are Dollar Tree.

I was not too happy with the way the glitter came out on the flowers. Next time I think I will use white Ultra Extra fine glitter or leave them bare and spritz them with some glimmer mist.
Here is a photo unadorned. This is when I was trying to decide placement.


This is a much softer look and would be great for a sympathy card. We live and learn. I swapped out the Distress inked leaves on the yellow rose (for a pink one) and put in some colored using my Spectrum Noir markers. The leaves 'pop' better. The glitter washed them out. Oh, the background die is also Spellbinders. I got it during their recent clearance sale with a few other goodies, so watch this space.

I am thankful to be able to celebrate the Resurrection with my family and friends. That is what it is all about in the end. Our love for Jesus and each other.

May the Lord keep you and Bless You.
Until then.

Sunday, February 28, 2016

Never Ending Card Decorated

This is a GREAT day to be alive. Would not want to consider the alternative. I am publicly thanking God for another day to continue His work. Not sure where that came from. It certainly was not what I was going to type, but the Holy Spirit took over and that is what came out. Praise the Lord. I reckon someone stopping by today needed to be blessed and reminded. Amen.

So, hello there. If you have  been wanting to decorate the Never Ending Card, I have FINALLY photographed the steps I use. If you follow these photos in conjunction with the Vee-dio posted below, you should be rocking and rolling in no time at all. Vee-dio is posted at the end.


This is the front of your card. Have fun adding your decorations and sentiments as long as they are right side up.

Here is the backside of the front card. Just keep in mind that the inside will become the outside and the outside the inside once you start folding and turning your card. Whatever you stamp in the middle of this card will show up again with the opposite side of the card back. Keep reading to see how.


THE CARD BACK. 
Here ALL of the images need to be stamped upside down. If you turn your card don't turn your stamp. If you leave your card as is, PLEASE turn your stamp so that the image stamps upside down.


What you are seeing here is the opposite side of the card back. the hearts are stamped upside down because when you see them within the context of the card they will appear right side up but are hidden when you view this main image. I would advise folding all of your pieces and then stamping as I show in the Vee-dio.


Here are all of the sides of the card shown when folded.


That's all there is to it. Check out the Vee-dio if you would like to see the demo live.
As always keep inking in the name of love.


Until then.

Saturday, February 27, 2016

Rolling in the Green

Hello all and welcome and/or welcome back. I have so many green dots that I am going a bit dotty. I decided to take all of the backgrounds I made and create a variety of cards. I settled on five of each sentiment. 


As you can see the one on the top is more muted than the one below. You can achieve many different looks with the same technique. Had a lot of fun playing. Decided to round the corners on all of the layers.


The sentiment is from Hot Off the Press. The Spellbinder die is the locket one. Got it at Tuesday Morning for pennies. The twine was from the package purchased at Michaels. It does not come across in the photo but the colors are ALL shades of green.


Thanks so much for stopping by. Keep inking in the name of love.

Saturday, February 20, 2016

Reverse Bokeh Effect

Happy St. Patrick's Day to all of my peeps out there. I do believe that the older you get the faster time moves. This is just about the time when I want the days to drag a bit. Anywho, go shout it from the mountain tops that I have put up another post in under a month. I know ha, ha. Here is what I have been working on these past few weeks. I am calling it my Reverse Bokeh Effect.

  
I wanted to do this with varying shades of green ink, but did not have what i needed so I improvised. These are all Recollections papers and I used my punches to get various sizes. I then inked the circles with White Gesso and counted out at least 23 for each A2 sized card. 

The multi-shape circle embossing folder came in really handy as it continued the illusion of the circles. I made several others along this same theme and will post those at a later date. I could not resist adding a silver glitter to the center of the circles. I suppose gold would have been better, but I did not have any that size.
The sentiment is an old one from G-Studios used with a Spellbinder labels die. I tossed in circular flowers to continue the theme. They are from an old QVC set I ordered many, many moons ago.

Do try this technique using the toned multi-color paper packs available at Michaels. Have fun creating and keep inking in the name of love.
Until then.

Tuesday, February 9, 2016

The Countdown is ON!!

If you are still thinking about what to do for Valentine's Day for those near and dear to your heart, time is running out.

Wanted to share a few more of the cards that I created. 

The white/cream centers were from a previous Mother's Day project and thought they would be perfect for this card. The LOVE is a Quickutz font. I have a lot of left over letters as there are two on each die. Will definitely use those for another project. For now they are in a baggie together so they won't get too lonely.


The hearts and arrows are from a pack that was recently on sale at Michaels. As you can see I adapted the size of the embossed piece to fit the card. Really liking how the black circles turned out. I punched them from the black paper that is matting the focal elements. Sneaky, I know, but a great paper saver.


This is the two-sided paper pad used for some of my inside sentiments. I believe it was from Bazzill. Will check and correct my post as needed.


Finally, the last cards for today. I think I have about five sheets of the paper left that I used for the cards and will create 6 two-page spreads using that. Yippeee, now I can take advantage of the after Valentine's Day will- you- please- take- this- paper- off -of- our- hands- sale. Why certainly.


Please keep inking in the name of love.
Until then.

Saturday, February 6, 2016

Happy Valentine's Day

Oh, my. I cannot believe that my poor blog has seen such neglect from me. I have been a busy bee and wanted to share with you a few Valentine's Day cards that I have cranked out. The stamps are Recollections 2016 except for the Bee Mine.


I am desperately trying to use up the pack of paper (Recollections 2015) that I purchased so that I can justify to myself the need to get a NEW package of love themed paper.


The inside sentiments are cut from a scrapbook page that is double sided. Perfect for making card fronts or inside greetings. They did need to be trimmed as they were 4x6. 


Recollections black card stock is my go to for anchoring my layers. I have considered using the gray one made by Recollections, and just might do that on my next set with some really soft pink paper. I did clean up the Bee smudges with a few gem stones. In card making you can usually cover any bloopers.


Thanks for stopping by and keep inking in the name of love.
Until then.