Thursday, August 20, 2009

Flower Soft Day 3

If you are still here for Day 3, congrats. I hope you have had a chance to view the latest installment. If not please check the links to the left and it should be the first one. If not click Retreat Day 3 to view it at YouTube. Flower Soft is an awesome product. It is truly glue and sprinkle. I just like being able to bring my artistic side to the project. In my opinion this is what makes it great for the 'novice' or the 'pro'.


Remember that you can use the code '5 Free Bags' at http://www.cutterscreek.com/ when you place your Flower Soft order to help with keeping you organized. These come empty and you fill them up. I can highly recommend the store because the prices are good and the service is excellent. If you spend a minimum amount your shipping will be free. That will not be hard to do. If there are items not in stock just ask Kim. If she can get it, you can own it.

For all you bargain hunters here is a heads up. The orange container that I use to house my flower soft is on sale this week at Office Depot for $2.99. I ran out and picked up six more. Now I have a total of 12. They do come in a range of rainbow colors and clear. Get 'em while the getting is good. They also have some itty bitty ones that would be great for storing brads, eyelets and charms.

To reward your commitment to this retreat I have posted this decoupage card that I put together. Now this one was a ton of fun. It was like dressing up my paper dolls from when I was a young girl/ok--young-old adult (I still own some).

The photo does not do it justice. I sponged the mountains, clouds and sun to create a background. Here are a few photos to give you a better idea. I added my pop dots to the pieces prior to removing them from the sheet. I found this to be a much easier method. Then I only had to focus on the front and lifting out the correct number.


I used my tweezers to help me get the alignment right. I found these to be invaluable. The other photos are close-ups once I added the flower soft.

I started with the polar white and worked my way from light to dark colors.


I wanted to use liquid applique on the mountain tops, but mine had turned to a creamy latte color.

Maybe I can save it for my coffee stamps. This is totally off topic, but I love coffee. Black and Hot. Ok, back to the task at hand.


My dots are VERY low profile. I used some from American Crafts that I picked up at Tuesday Morning.
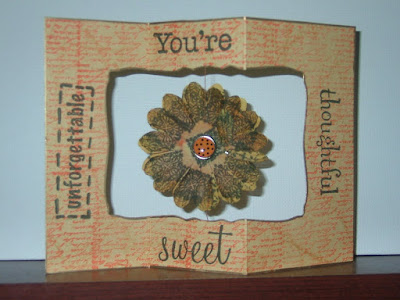
The card was folded to create a diorama type frame using my Scor-Pal. The quote is attached to a piece of acetate that covers the entire scene. This way I can display it and not have to worry about little fingers trying to remove the Flower Soft. I edged the side panels in the silver Peel Offs.

Since there is depth to the background it gives the appearance of a diorama with added dimension from the decoupage pieces. Here is a different view.


Hope you will experiment and play around with Flower Soft. I am sure they will be adding additional products to their line. Just ask Kim at http://www.cutterscreek.com/

Thanks for joining me on the Flower Soft Retreat---mmmm.....we could do a world cruise on another product? See how I get carried away? Before I forget, prior to adhering my pieces I used my Sakura glaze and metallic pens on portions of the images. It comes across in person, trust me.

Keep creating and inking in the name of love.
Until then.

Wednesday, August 19, 2009

Flower Soft Day 2

Whew. This has been a busy retreat. I am posting the Wishing Well card that I had in the video opener. I changed the background to lavender and stamped some flowers on the side and added some hand drawn elements that I covered with the lovely Flower Soft. If you have not seen the video you can watch it here. If not click FlowerSoftRetreat to view it at YouTube.


You could also create an entire field of flowers and have your Wishing Well as the focal point; place a few clouds and birds in the sky: idyllic. I kept mine pretty basic on the side panels by stamping with Versamark and then using a clear embossig powder. The stems were hand drawn. Here are a few more closeups of those panels.


Now, on to what you all have been waiting for...a sneak peek of the finished beige door card. Before I show that to you I would like to give the code again for the freebie with purchase. When you visit www.cutterscreek.com please enter "5 Free Bags" to receive your empty bags that can be filled with your new purchases and help to keep you contained and organized. Don't forget your toppers and your glue while you are there. These items will get you started and the projects are EASY. Ok. Now. Ready? TADA.......

Isn't this spectacular? When we have completed our project, this will be the end result. Again, you can glue and sprinkle, but look what happens when you dress it up a bit. STUNNING. Here are a few more views of the completed topper with the Flower Soft.
The dimension this product adds without a lot of bulk is incredible. Don't you want to take that snow and have a snow ball fight? Or, make some ice cream?


Before I forget, I also want to mention that there is a yahoo group for www.Cutterscreek.com
You will definitely want to request membership. Kim is famous for interacting with her customers and sponsoring fabulous contest, doing giveaways, providing discounts and all around fun. You can also check out her blog at http://kreativekim.blogspot.com.

It is my sincere hope that you have enjoyed this Flower Soft retreat. Please don't forget to check back for the Day 3 Vee-dio. If there are questions you have that I have left unanswered, please let me know. I enjoyed the journey and can hardly wait until the next time I can add a bit of ink to my projects.
There is a Scarecrow that I need to work on to get ready for fall. That autumn Flower Soft is sounding yummy and calling my name. I had better get busy.

Gotta find some fall ink colors, in the Name of Love of course.

Until then.

Tuesday, August 18, 2009

Flower Soft

Hello everyone. I hope that you are taking advantage of these wanning days of summer. If you have not gotten out your camera, please do so. You will be able to document the swift changes that will take place in the next few months. How about taking a photo of yourself/your family in front of the same tree for the next four seasons. If you print them out in B/W you can color them in using chalks and a wonderful new product called Flower Soft.


If you haven't checked out my newest video on YouTube see the section to the left or go to FlowerSoftRetreatDay1 to get more background information.


Here is a Christmas card topper that I decorated using the Vintage Christmas and the super sparkly Polar White from the Diamond Glaze collection.


Attempting photographs with this product is a bit tricky but I have also tried different angles. Here it looks as if the ivy vines are floating on the page. Pretty neat. I really like the 3-D look you get when using flower soft.


The range of colors available is incredible. There is something to meet every need.
When you go to place your Flower Soft order for this incredible product at: http://www.cutterscreek.com/
and use "5 FREE BAGS" in your coupon code box; you will have the empty bags ready to fill with your Flower-Soft and be well on your way to getting and remaining organized. Use a slick writer to make sure the name is permanent on your bags. Then your 20 and 30ml containers could be used to house those hard to control brads and eyelets.


To the right is where I enhanced the bells with more Vintage Christmas and some Polar White along with a bit of white glitter. Of course I could not resist pulling out my Sakura metallic pens and also my Fiskars red glitter pen. It is those small touches that really makes your work stand out.

I am having a load of fun playing with this product. It is nothing like embossing powder. It easily pours from and back into your bag with no waste. I would suggest that you allow the product to set in between color usage and start with the Polar White first. You really want to keep this pure white. I also created a little bag of 'leftovers'. When cleaning my area any flakes that I missed go into that bag and I can use them on a wildflower topper. See, waste not whatsover.


Please keep inking in the name of love.
Until then.

Saturday, August 8, 2009

Embellishments using Clipart

Hello again. This is August and the month of my birth. I have been having a blast celebrating and creating new things.


I have been receiving samples of clipart images from Dover Publishing for about two years now. These are delivered free of charge to my inbox. I recently had a chance to download several silhouette images. I turned a few of them into tags.


Having Mary Davis send a link to me is a wonderful opportunity to peruse many of the CDs offered and decide which purchases to make. Additionally, I can pull many of these images into my Pink Wishblade software or Inkscape.org (free shareware editing and design program). I have become totally addicted and decided to come up with more creative way to use these fabulous designs on my scrapbook pages, cards and other artwork.

Here's the video:


After cutting them out I have used the Ranger Glossy Accents to give a glazed 3-D look. I have also use the Sakura metallic, glaze and stardust pens to add a bit of bling. These can also be printed and cut in triplicate and them made into an impressive dimensional by placing foam dots between the layers.

Any chance I get to add a bit of ink to a project is a bonus for me. Try your own hand at using this "free" clipart to bring new life to your projects. Don't forget to add a bit of ink---in the name of love.

Until then.

Monday, August 3, 2009

The Spinner Card

Hello everyone. As promised I am working furiously to post information about my videos on this blog. I had a fab time creating and playing with this card.
The background is stamped with a HOTP (Hot off the Press) phrase stamp. The other sentiments are from Plaid All Night Media. I overstamped the flower and used brads on both sides. I love the simplicity of the card.

For this next one I went a little lighter and added the adorable flower stamp from KI Memories. The garden embellishements are from a pack of buttons I picked up on clearance from Michaels. I simply removed the button shanks and attached them using my favorite adhesive: Glossy Accents from Ranger. The center flower is three layers with the top one being a flower encased in epoxy.


I was not into complicated measuring and cutting so I formulated a suitable and workable substitute that would allow me to assembly line-- mass produce these cards. I do hope that you give it a try. Following is another take on that same idea. I wanted to use up any remaining embellishments. Waste not, want not.


Can I make the claim that these cards will provide endless hours of enjoyment? I could barely put mine down in order to edit the video. You can find it here.


And this is the trio I produced. When they were on my bookshelf a slight breeze caused them to turn and flutter. Ahhhh. Pure bliss.
Keep creating and inking in the name of love.

Until then.

Sunday, August 2, 2009

Frog Leg Card/Diamond Fold Card


Hello crafters and welcome back to Inkallusions. I am finally getting it together by learning how to portion my time better. I become so involved in what I am doing that I lose all track of time.
I would like to share some 4th of July cards I made to decorate my home this year.


I have taken creative license and renamed the Diamond Fold card to the Frog Leg Card courtesy of my son. At first glance he exclaimed, 'It looks like a frog's legs'. I could not agree more. Thus the christening of this card. Since we were nearing the celebration of the birth of the United States of America, I chose to create something patriotic. These are the results.


I can see this design being used as place cards for the holidays or a rehearsal dinner displaying a photo of the bride/groom to be with the appropriate attendant/parent. What a wonderful keepsake which can be displayed year round. This is what the card looks like when it is flat in the envelope.

Here is a view when it is opened and displayed.

You can watch this video to see how it all came together.

Of course you can create the look of additional layers with the creative use of ink. As always keep inking in the name of love.

Until then.

Saturday, August 1, 2009

Back on track

Wow. This has been a whirlwind time for me. I realize that I have been extremely tardy in posting to this blog. All for a good reason. I have been busy making videos for Youtube. I have also added a link so that you can view them from here. I am currently working on videos 8, 9, and 10. There is sooo much to do that I get chills just thinking about all of the creative ways to use my products.

Just this week, I received an order from Luminarte. It is loaded with Twinkling H20s, Radiant Rain and Daubers. The colors are simply luscious. Look to see card and page layouts using those products appearing soon. At some point I hope to post all of the cards I made on Youtube and have some of the instructions available for anyone who would like to duplicate the ideas.

Just in case you thought my life ended at Easter, it did not. Here is a card that I sent to my mom using the emboss resist technique with a Fancy Pants flourish stamp, a nestability die, some water color paper, and distress inks. I almost did not want to add the Happy Mother's Day message to the front because I did not want to detract from the overall symmetry of the card. At the last minute I stamped a small greeting and hand cut and layered the circles. The flower is held to the aperture using the Glossy Accents from Ranger. That stuff is awesome. I use it like glue most of the time.

This is the inside view. The left side is stamped with a variety of flower images and I used Sakura pens to add a bit of sparkle.
I also used the Fancy Pants stamp to create a border on the right hand side. I like how the flower and the scalloped circle mimic each other. This is one elegant card. My mom says she received numerous compliments.
Remember to think in ink and always in the name of love.
Until then.