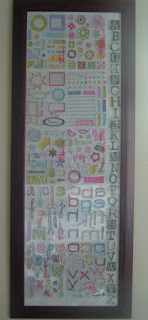
I was able to get several sets of stamps on clearance that were not laser cut. Don't let that scare you off from purchasing. Just use a good pair of scissors (I love the yellow CutterBee ones) and trim off the excess.

Place the plastic (mine is not glass) cover inside the frame, then the backing sheet of prestamped images and finally the back cover. Take your acrylic stamps and place them over the corresponding image on top of the plastic. Cover with clear acetate sheet that came with the images. Hang and enjoy. When you are ready for a stamp, lift off the acetate cover of that stamp, take the stamp, use it, clean it, and return it. You might find that you use them more, I do.

I am not concerned about light exposure, as I can control it very well in this room. If I plan to work for hours on end (yeah, right) then I would simply tape a piece of craft paper over the frame.
I still have lots of other acrylic stamps stored in CD cases. These on the walls are easier to see at a glance and are frequently used. Here is to hoping that you find new ways to repurpose what you already have and to always Ink in the Name of Love.
Until then.


Veronica, great idea. I will definitely consider doing this. Thanks a bunch.
ReplyDeleteI received your pin of the video concerning how to make a short die into a long one as a suggestion from Pinterest. OH MY GOSH! Am I glad they did! Your video was very helpful and concise and I plan on using some of your techniques in my paper crafting.
ReplyDeleteWhile viewing your video, I decided you were a teacher and confirmed my suspicions after accessing your blog. My clues? You used objectives at the beginning and recapped at the end. Soooo helpful! I taught elementary school out of college and was a trainer for the Department of Revenue in Tallahassee in my last job. You have GOT to be a super teacher from reading your latest post. Making Mother's Day card with all the details you used took great organizational skills and loads of patience. Keep up the great work at school and on your blog. Now I've got to catch up reading all your older posts!