Showing posts with label Distress Inks. Show all posts

Thursday, October 20, 2011

Officially Fall

There is nothing like a leaf covered lawn to signal the arrival of fall. As my son and I sat on our deck, we truly realized the meaning of fall as many of the trees in our yard shared their bounty with us by falling to the ground. 

After awhile I asked him to get the push broom to clear the deck while I prepared lunch. He came to the kitchen door to tell me that  it was a losing battle. He said, "Mom, that tree is fighting against me." As soon as he had one half cleared, the other became covered again.  I made him keep going anyway. 

I got an awesome Fiskars rake at Tuesday Morning along with one of the leaf collection thingy...it is GREAT. If I can find some pics I will post them. Makes raking and bagging leaves a breeze.

The next day we filled about 5 bags of leaves and called it a day. The wind and rain has since brought more leaves our way. The lawn is now a jeweled splendor of nature's hues. I just love it. Here are a couple of more variations of the cards I made in my YT Vee-dio.


Keep inking in the name of love.

Until then.

Sunday, October 16, 2011

Falling Into Fall

Happy Fall EVERYONE!!!! I know it has been awhile, but I have posted some vids on my YouTube channel so be sure to check them out: The Couture Crafter.

On to some of the cards I shared in my latest Vee-dio. This way you will get a chance to see them up close. The stamp is an Inkadinkado cling and the leaf punch is from EK Success. The embossing is the CB folder Musical Flourish. (i think)


These were done solely by using distress inks as the medium. If you see a bit of sparkliness, that is from my Sakura stardust pens. Love those.


The one leaf on this one was covered with some of the Martha Stewart clear glitter. Really like it as an accent. As always, thanks for stopping by and keep inking.
Until then.

Sunday, January 16, 2011

Corner Punch TKO

This was to be my final bout with the punches--hence the TKO. Just as I finished uploading that Vee-dio another idea popped into my head. I am hoping I can get it done. In all fairness I had to place it on my list because there were a few things ahead of it. Vee-dio is embedded below if you have not seen it.

Below are just a few examples of some of the things I did with the corner punches on the 4 ¼ x 5 ½ pieces of paper.


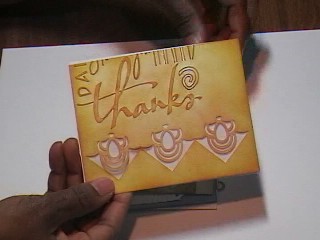
I went into my container of folders and just randomly selected a few. As you will notice, several of them were done without getting the embossing on the punched pieces. I will share how to do that at a later date. I did not think to show that while doing the Vee-dio and then it came to me later. Again, I had to put it on the list.


Now on to making the strips. This same method would work on a 12 x 12 sheet of cardstock cut into strips. It takes just a small amount of measuring to ensure that your punches are even and accurate.

This was cut at 2 inches wide with 1 inch spacing.


This strip was cut at 2 ¼ inches wide with 1 inch spacing.
Here you can compare them side by side. It still amazes me how much difference a quarter of an inch makes. Lol.
 
The same treatment was done with the Double Loops corner punch. The measurements are 2 ¼ inches wide and punched every 1 inch.


Another comparison between two strips both cut at 2 inch widths. The one on the left was eyeballed and you can clearly see what happened. Whereas, the strip to the right was measured for one inch spacing.

By simply putting in a bit of work in the beginning you will certainly reap the rewards in the end. If you know you want to do a lot of strips, mark your paper first and then cut it to the desired widths. I love how the Layered Arch punch turned out. Cool.


My final punch was the new Heartbeat from Martha Stewart. I can really see using the strip technique on this one and wrapping it around a box of chocolates. That strip along with the leftover confetti sprinkled on would be awesome. 


Thanks for stopping by today. Hope I was able to help you look at your punches in a new way. I love punching and embossing in white because I can make it whatever color I want it to be. Try this same technique on patterned paper and I am sure you will be just as pleased. Do me a favor and add a bit of ink here and there.
Until then.

Saturday, January 1, 2011

Happy New Year!!!


HAPPY NEW YEAR EVERYONE!!!

Wow, it is officially 2011. Way back in the late nineteen hundreds (sounds like eons ago) Prince was singing about 1999-2000. Well, we hit and surpassed that mark by 11 years. 

Do you recall the fears that were spread during that time: Computer crashes and glitches, ATM machines unable to process requests, widespread blackouts, water shortage, etc., simply because of the 00 digits.

I know several people who purchased generators and tanks of water and stockpiled food. Me, I went out and brought the New Year in right. God says, I have not given you the spirit of fear; but of power, and of love, and of a sound mind. 2 Timothy 1:7

So, last night I was ringing in 2011 by playing around with the Tim Holtz Distress Inks while watching Laura’s UStream –Following the Paper Trail. Guess what?  We had a special visitor…T!m himself. He only stayed for about 10 minutes, but it was great having him pop in. There I was busily working with his inks, serendipitous for sure. With that in mind, I thought I’d provide a bit of eye candy for you.


Aren’t they luscious? I could just eat them. Please keep in mind that this is just a sampling of the colors. Sadly, I do not own all of them.

I really love using these inks, but sometimes it is hard to ascertain which colors are needed for a particular project, especially with the Blues.


I finally broke down and made some color swatches for myself. I am going to punch out some of my corner punches to help with my record keeping. I used the Black Soot on this Holly Leaves corner bunch. Why? Because it was at my elbow. lol. I did three of them trying to see how dark I could go with the saturation. Holly Leaves--light, square to the left--medium and the one on top of the pad--darker.


Don’t ask me how, but somehow I would up with two Scattered Straw pads. I am glad as I like that color.


Each piece started life as a white 2x2 card and I used the Inkssentials tool and blending foam to color them.
 
The Tattered Rose and Milled Lavender are probably the lowest on my list of well-liked colors followed closely by Shabby Shutters, too soft for me.


My faves: Vintage Photo, Chipped Sapphire, Worn Lipstick, Mustard Seed, Spiced Marmalade, Barn Door, Stormy Sky, and Peeled Paint. Yum-O!!! Can I sneak in Antique Linen and Old Paper? Really liking it with the Martha Stewart Iron Gate Punch. The two marry well.


Just wanted to pop in and help you ruin your resolve to not shop as much this year…lol. If I told you about my last year purchases I would have to take you hostage. Keep inking and thinking with love.

Until then.

Sunday, November 28, 2010

It's beginning to look a lot like Winter

Ha, ha, ha. I know you were expecting to read, Christmas. I must admit, it is beginning to resemble that time of the year. Especially since my tree is up and decorated. No presents as of yet. Just to keep myself in the mood, I am posting a card I did for our November Challenge and a submission entry for a design team call. 


Without further ado, here is the card:
Merry Christmas, Deer

This card was created using the deer cut at 3 inches (images 3& 4) from the Christmas Solutions cart, Martha Stewart snowflake punch--Echo Park Christmas pack, and the Spellbinder Beaded oval die--also Echo Park paper. Red pearls are Kaiser Kraft. The creamy ones, not sure, but their quality is not that great. Might have grabbed them from a discount barrel. You get what you pay for. Antlers and hooves are colored using a Sakura metallic brown pen. Spritzed the card with Peach Delights Glimmer Mist and the label with Red Velvet Glimmer Mist. The stamp is Studio G stamped with black ink and embossed. I know I could have jazzed this up with lots of other embellishments, but kinda like the simplicity. And from another angle.

Merry Christmas, Deer


And then last but not least is a layout I submitted as one of my design team entries. I think I submitted four in all.

The base paper is Fancy Pants  Spring Fling (circles) and Holly Jolly (green) with the ivy embossed panel done with a Sizzix plate and brought out with the Shabby Shutters and Chipped Sapphire Distress Inks. Also used the Martha Stewart deep edge Presents punch. I know I said to someone else that I did not need this one since I had the smaller version. Famous last words. The Looky, Looky was done on the computer using the Snowdrift font. The circles (Spellbinder) are Fancy Pants Holly Jolly line and overstamped with a Fancy Pants writing acrylic stamp and edged with Adirondack inks: Oregano, Lettuce and Ginger.  The photo doesn't show it, but the Outlines Rubber stamp trees are all glistening from Sakura stardust pens. Have I mentioned before how much I love those pens? The presents are the circles that I cut away from the Outlines tree background and used a Fiskars punch and reassembled on a white base. Fiskars has some super cute Christmas ones this year.

I will spill the beans on which company when I hear from them---one way or the other.

Have been spending more time with my son. Hope to get some projects completed and posted in the next few days. All with lots of ink. I should change my name to inky fingers. Nah, too close to icky...lol.
Until then.