Thursday, September 24, 2009

Shimmerz: Blingz It On

Happy Fall Y'all!!! Hello everyone. I hope this day finds you healthy and wise(r). It is a beautiful summer-like day here in Northern Virginia, but I know that fall is on the way. If you're here because you saw the  Shimmerz Vee-dio on YouTube, welcome. If not, it is the first video to the left.


Let me apologize in advance for the picture quality. I have not replaced my point and shoot camera. I will take new photos once I get it and repost them to this blog. Now, on to the Shimmerz.


I did not use any Sakura stardust or metallic pens on these projects--as a collective gasp is heard around the globe. This Shimmerz is shimmery enough and did not require further enhancement. Shimmerz comes in three ways--as a shimmering spritz (mist--now available in a mini bottle), Shimmerz paints which is more viscous than the mist, and the Blingz which is a thicker paint with lots of chunky mica. Both paints come in a pot. All three are water soluble for easy clean up and are non-toxic.


These products are highly irridescent and quick drying. I really like the versatility they provide.


One thing I discovered that was most helpful was using my paint brush to clean the ridges of the lid and the jar's neck. I returned the product to the jar. If you find bits of dried flakes on your jars, just remove them and return them back to the jar. It will reconstitute itself.


My favorite was by far the Fall scene using that incredible Autumn Flower Soft with the Spiced Cider Blingz (all of which are available at http://www.cutterscreek.com/. You will have to go back to my previous Flower Soft blog to find out how to get a freebie with your purchase.


Now to what most of you are seeking. The code to use when shopping for your Shimmerz Productz at http://www.cutterscreek.com/. Just enter Shimmerz Skittles and you will receive this beautiful mixed bag of flat back plastic gems. You will wonder how you ever lived without them.


Remember to keep inking, spritzing and blinging in the Name of Love.
Until then.

Saturday, September 5, 2009

Heritage Scrapbook Pages

My dear grandmother is 92 years old and still as fiesty and active as ever. She is the first one in line since she is the eldest. My oldest sister tells me that she recalls when that photo was taken. She went to the session with them. When you visit my grandmother, she makes certain that you are comfortable and well fed. For years I have wanted to try her recipe for rolls. They turn out so light and fluffy that they melt in your mouth. There is no additional need for butter...just a dollop of her homemade jam and there is a party in your mouth.


Each time I visit I always find myself going through her photo albums. There is a story that accompanies each and I love hearing about them. My grandfather and my gram both kept albums. She is now the keeper of his albums and stories.
During one of those visits I begged her to allow me to borrow some of the photos  to create some heritage pages.
 I had black & white copies made through Shutterfly. They are an excellent online photo service that does quality work and stands behind their product. Turnaround time is incredible and the software is very user friendly.
An album was created for my gram, my mother and or course for me. I used an 8x8 format and papers from a Cosmo Cricket kit with additional embellisments from my stash. This card stock is so thick that I was able to use both sides of the double sided cards. I just had to compose the pages in such as way that brads and eyelets did not go through to the other side.
My gram went through every photo with me and gave me the history behind it that I diligently recorded.

I learned an unbelievable amount of information about my family that I never knew and no one talked about.  My eldest sister told me that it is really my gram's sister who is the keeper of the family history she is at the end of the line but is not the youngest. She knows EVERYTHING about EVERYONE. A visit with her is next on my list.


They are from a very large family as am I. My great grandparents had 14 children---7 girls and 7 boys. Five of the sisters are still living, they had their last brother's homegoing two years ago. I had the fortune of knowing and remembering eight of the siblings and of course my great grandparents.
That is one of the reasons that I scrapbook. I want future generations to know their history and the thoughts, dreams and ambitions of the people who came before them.
If you have access to old family photos, let me encourage you to get some copies made and record that valuable information.

Once your pages are created, you can scan them into a file at Shutterfly and have additional books made as gifts for your family members. I wanted to share a few pages from my album. Hopefully they have inspired you to pull out those old b&w's and jazz them up with a bit of ink. Keep  preserving your memories and inking in the name of love.
Until then.

Thursday, September 3, 2009

Baby's First Book

Hello everyone. After taping the Flower Soft Series, I had to take some time off to spend with my son before school begins.

He wanted to make a few of his "own" videos. We have been having a ball. With his permission, I might be able to share some of the funny outtakes.

I wanted to share this 6x6 baby book that I made as a shower gift for the expecting parents.

The entire project took about two evenings to complete. I used some Anna Griffin paper that I owned and just pulled embellies from my 'baby' stash. I patterened my idea from a baby book project that Anna presented on DIY Scrapbooking.


I took several sheets of 12x12 coordinating paper and cut each into 6 -4x6 pieces. Some of the 4x6 were then cut into 2x6.

The pieces were dealt out and mixed and matched to create different background combinations. Each baby title page consisted of three pieces of 4x6 papers. I felt this afforded me more variety and more opportunities for a cohesive look.

The opposite page for the photo was adhered together with a strip that was cut to 2x6.
I used ivory cardstock for the Baby's First titles. If you have not guessed by now, the couple was expecting a baby girl.

I created a random list of Baby Firsts.
Baby’s First:
Tooth
Smile
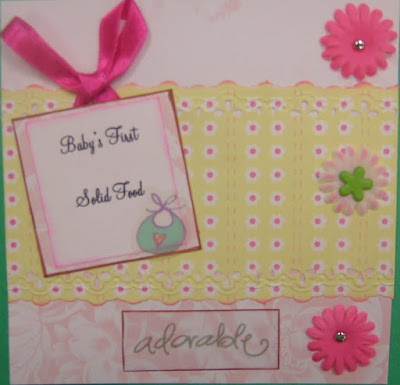
Solid Food
Word
Bath
Month
Steps
Trip
Doctor Visit
Time Standing
Family Portrait


The mother will then insert photos of the baby on the opposite blank side. This will nicely hold a 4x6 photo. The date can be added along the side of the photo. I designed the pages to be easy for the new parents. The only thing they needed to be ready for was to capture a picture for that occassion and slide it into the page protector. Here is an example of the blank facing page.
This is what the pages look like side by side in the album.

Just a couple of more examples of some of the completed Firsts.
I do apologize for the quality of the photos. I did not use my regular camera for these. It was one that I borrowed because I wanted to capture the pages before handing off the book and as you can see, you get what you pay for.                                             I allowed the papers to determine my accent colors. This helped to create the pages quickly and easily.                   Since my family has a plethora of 'boys' I was delighted to play around with something pink and girly. I could not resist breaking out my Fiskars decorative edge scissors and decorative edge punches.

Give this a try not just with a baby book but maybe all of your child's First day of school for 12 years. Write down his/her impressions and what they liked most. Or maybe a year opener page and the facing page could be the last day of school. This would easily show the growth of your child during the school year and over the summer months.
As always don't forget to add that elegant touch of ink to all that you do and keep inking in the name of love.

Until then.