Monday, August 14, 2017

Throwback Thursday on a Monday

I was tidying my creative space and stumbled upon these.


Don't recall the maker but I believe I ordered them from QVC.


Not sure where the rest of the alphabet is hiding but there were also word cards in the stack and I was decorating them to put in a baby book for my son. The cards were blank manila stock and I added the textures, embossing, inks, etc.


Another unfinished project that I need to COMPLETE.

Thanks for stopping by. 
Until Then.


Sunday, August 13, 2017

3x3 cards rule

Hello my crafty friends.

My love affair with these cute 3x3 cards has been revived. They are quick, easy and makes efficient use of the smalls that we all have lying around.


I will have to look for the name of this paper, but I love the freshness and it is a pack I got from Tuesday Morning. The base is the heavyweight 110 lb Recollections paper from Michaels. The envies are made from the White card I get from Tuesday morning. The weight is not specified, but I believe it is about 40-50 lbs.

The Little B words were perfect for this project. There are four in each sleeve with each phrase represented. Again, I simply need to top them with the coordinating paper and staple them closed. The packaging is from the Wilton line. They are 6x 3.75 and perfect for these cute little cards.

Thanks for stopping by and until the next project.

Saturday, August 12, 2017

General Tag Making

Hello to all of my crafty friends. 

I know it has been a minute since I posted, but please know that I have been a busy little bee.  I am hoping to sell at Christmas craft fairs this year. I need to amass a sizable amount of goods. Sharing a photo of some gift tags I made using Washi tape and a few die cuts. These are NOT Christmas related. I have made a box load of those already.


The tags are the small precut ones that I scored at my local Tuesday Morning stores and shared in previous haul videos. If I went in and they were available, I grabbed them. Yes, I could use my die cutting machines, and believe me I have, but these are time savers and that is uppermost on my agenda.
I sorted and packaged them four to a bag and cut a piece of white card to fit the envelope. Those are the long ones that I got from Tuesday morning and cut them in half. I just need to add the topper and staple them closed.


Working through my stash and loving every minute of it.
Getting sad that  school will begin soon and my craftiness will have to take a back seat for a few weeks as I get settled back into the work routine.

Thanks for stopping by and I am trying to be more diligent in posting.
Until then.

Saturday, May 27, 2017

Coffee Cards Share

Hello one and all. I made a batch of coffee cards (around 50) and want to share them with you. I did make a YT vee-dio (link at the bottom) where the majority of the details are given. I am posting some in progress pictures for you.


 These are the paper pads and stamps that I used to create the cards
 . 


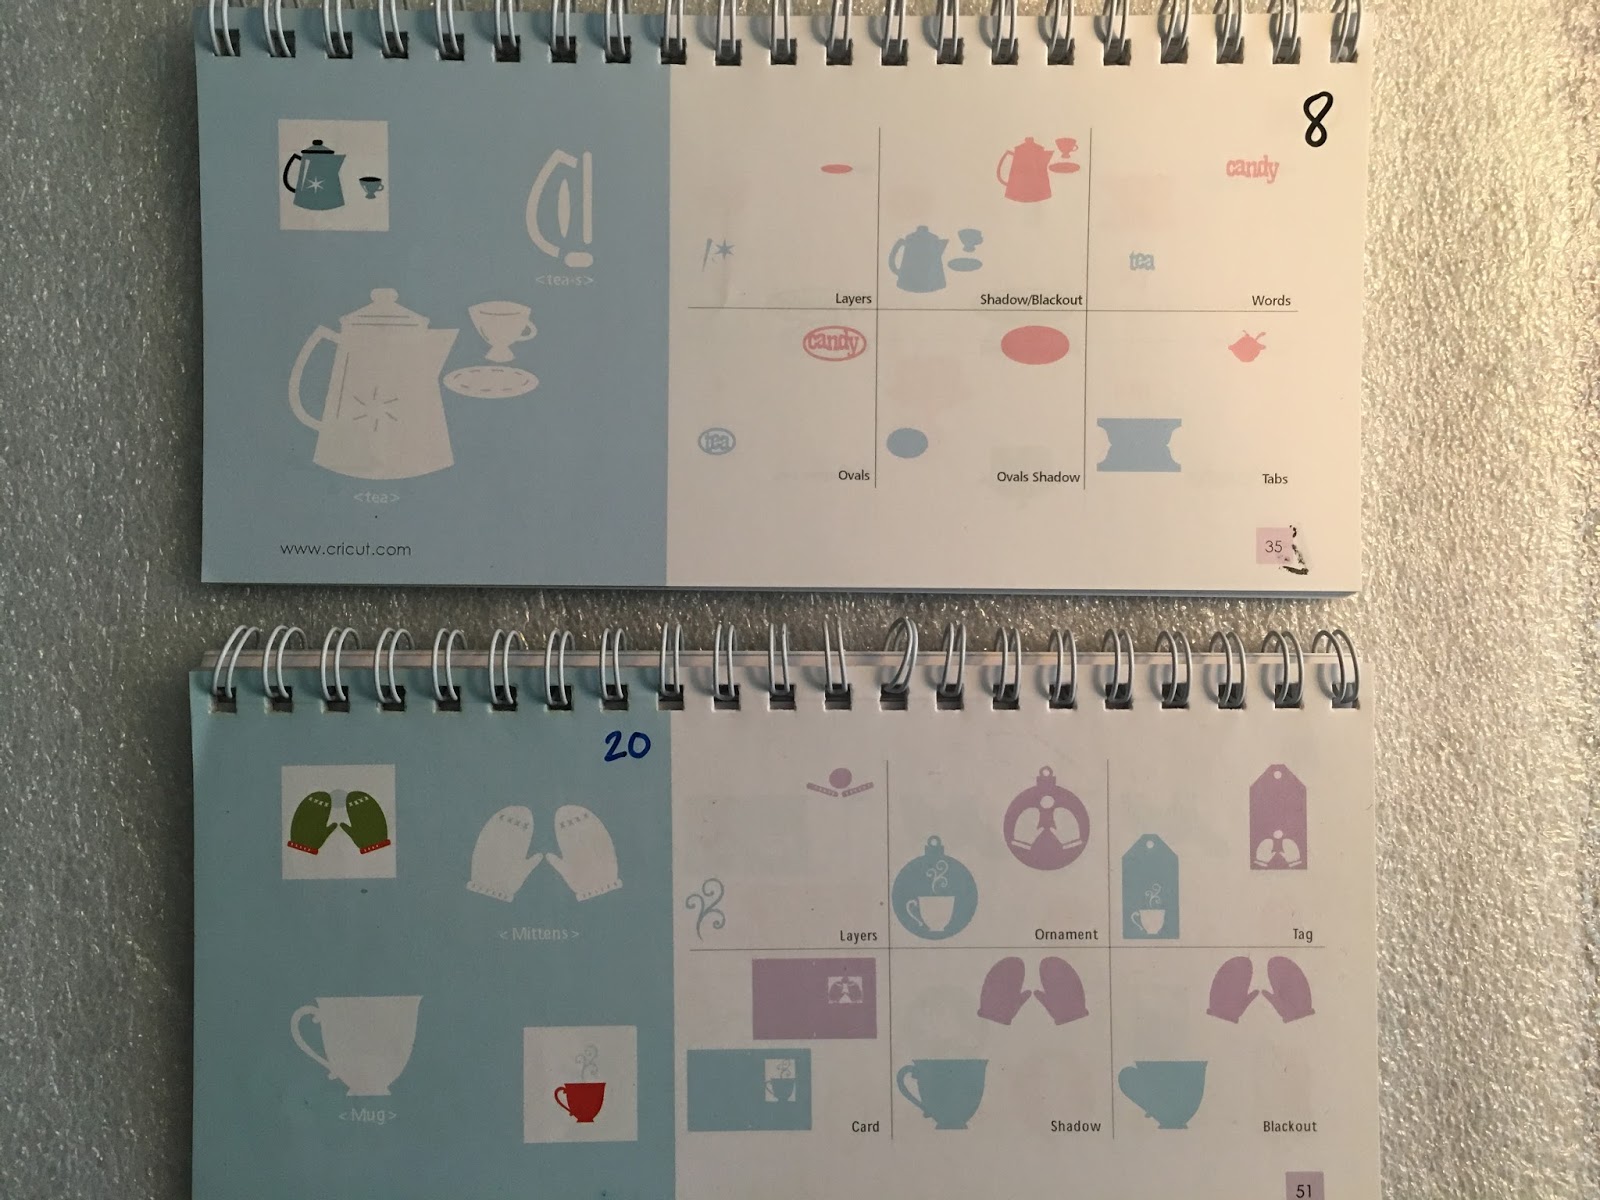
My cut images came from two Cricut Cartridges and indicated in the photo. The top is From My Kitchen (saucer) and the bottom (cup) is Joys of the Season. I also cut the outline shadow at 1 1/2 inches.


Once the images were cut I embossed them and colored them using a variety of Distress Inks. The saucers were embossed with an Ali Express Oval stitched die. I thought it really gave a realistic indentation to the saucer. Remember to turn your cups with the handles facing different ways when embossing.


Yes, I snapped this photo upside down and forgot to turn it, but I am sure you get the idea. I inked the stamped image while it was still in the die.


The cards were cut to 5x5 and I stamped coffee beans using the Fiskars coffee themed stamp set and colored using Spectrum Noir markers. I adhered the paper and did the stamping while the cards were flat. I did not fold them until all items had been attached. After some feedback I carried the beans all the way to the ends of the card.

This small cup set was stamped inside of each card and colored with Derwent Coloursoft pencils.
This was the final result. I made sure that the sentiment matched the cup in the middle of the stack. The rest were some Prima flowers (and others) that I had. My attempt to use the Nuvo Liquid Drops was hit or miss. I resorted to some K&Co. embellishments for some of the larger flowers.


This post is a follow up to my YT video. You can check it out here if you have not seen it.

Coffee Cards

Until then.

Sunday, March 26, 2017

Card Share #s 7 & 8

This has seriously been a marathon run for me. I am up to card shares #s 7&8. This packet of Pebble's paper has been perfect for this project.


These are truly patriotic cards and I love them. Here's to celebrating the USA. I am posting the vee-dio below in case you missed it.


Until then.

Card Share #6

Hi and welcome.
I having a grand old time using these cute little stamps from Hampton Arts. Don't know why I have waited for years to get them inky. 
This raccoon is so stinking cute.  I used the Indie Chic Nutmeg card collection from My Mind's Eye. This card is based on card sketch, Mojo Monday #432.


Next time I will extend the flags out more. This seems a bit bunched up on the card. If you missed the vee-dio I am posting it here.

Until then.

Card Share #5

Sadly, sympathy cards are a must. I have kept these very simple and elegant. 

I want the recipient to smile and not be overwhelmed by an overly done card. The color coordination can be kept to the materials you have on hand. Instead of ribbon, washi tape would make a great accent.

For now I only have the vee-dio. I will photograph some of the cards and update the post.


Until then.


Card Share #4

Hello and welcome. 

Wow, these cards are flying by now. This is one I enjoyed creating. I used the Clearly Besotted Always and Forever stamp set. This was very easy to pull together as the layers were not complicated. I only made the three colors for this one. I took a lot of liberty with the coloring of my poppies. That is the joy of creating. You can make it YOUR own.

These are just a few of my samples.


In case you missed the vee-dio, I have posted it here.


Until then.

Card Share #3

I have to admit that I am having fun getting back into my groove of creating AND posting. Hello and thanks for stopping in.

This is the next installment of my card sharing and is based on Mojo Monday Sketch #431. I find that I don't share my card creations often enough. 


I went through one box of stamps and pulled some that I had NEVER used before but loved them when I purchased them, and these Foot Longs from Hampton Arts designed by Kelly Panacci fit the bill.


I used this carnival paper pack that I found on sale at JoAnns and the My Mind's Eye the Mabel collection. I colored the possum with my Derwent Colorsoft Pencils.

The circles and the scallops were cut from this Spellbinders set and not the Cricut Cartridge. 


I used the EK Success Flower Punch and adorned the centers with jewels from Queen and Co. Candy Shoppe.


Posting the video share here in case you missed it. I will be sharing more so please don't be a stranger.


Until then.

Saturday, March 25, 2017

Card Share #2

Hello and thanks for stopping by. I hope your day is going well. I am back again to share another card sketch. It feels great to work my way through my stash. This opens the window to new purchasing opportunities. This is my latest....


The puffy turtle sticker is from a set I found at the Dollar Tree. The stamp is from Hampton Arts and a Tuesday Morning find.

Really like how it turned out. It was most likely loosely based on a card sketch but not sure which one. I know some were left over pieces that I pressed into service. I also have a video accompaniment to the card.


Until then.

Thursday, March 23, 2017

Springing into Spring

Although we have slightly passed the Vernal Equinox, I still want to wish each and every one of you a Happy Spring. Many of you have daffodils and sunshine but it is still winter in Northern Virginia. The bus stop temperature was 24 degrees, but thankfully no winds.

As promised I want to share more of the cards I have been creating. 


I am using the Hampton Arts Foot Long stamps. They stamp beautifully and the sizes are perfect for cards. Were I to attempt this sketch again I would definitely allow for better spacing of the flags. that bottom one could have come down a bit more. We live and we learn. I decided not to add anything additional to this card which would make it perfect for a guy.

In case you missed the video on YouTube, I will post it here and it gives the remainder of the materials used.

Until then.