Sunday, November 28, 2010

It's beginning to look a lot like Winter

Ha, ha, ha. I know you were expecting to read, Christmas. I must admit, it is beginning to resemble that time of the year. Especially since my tree is up and decorated. No presents as of yet. Just to keep myself in the mood, I am posting a card I did for our November Challenge and a submission entry for a design team call. 


Without further ado, here is the card:
Merry Christmas, Deer

This card was created using the deer cut at 3 inches (images 3& 4) from the Christmas Solutions cart, Martha Stewart snowflake punch--Echo Park Christmas pack, and the Spellbinder Beaded oval die--also Echo Park paper. Red pearls are Kaiser Kraft. The creamy ones, not sure, but their quality is not that great. Might have grabbed them from a discount barrel. You get what you pay for. Antlers and hooves are colored using a Sakura metallic brown pen. Spritzed the card with Peach Delights Glimmer Mist and the label with Red Velvet Glimmer Mist. The stamp is Studio G stamped with black ink and embossed. I know I could have jazzed this up with lots of other embellishments, but kinda like the simplicity. And from another angle.

Merry Christmas, Deer


And then last but not least is a layout I submitted as one of my design team entries. I think I submitted four in all.

The base paper is Fancy Pants  Spring Fling (circles) and Holly Jolly (green) with the ivy embossed panel done with a Sizzix plate and brought out with the Shabby Shutters and Chipped Sapphire Distress Inks. Also used the Martha Stewart deep edge Presents punch. I know I said to someone else that I did not need this one since I had the smaller version. Famous last words. The Looky, Looky was done on the computer using the Snowdrift font. The circles (Spellbinder) are Fancy Pants Holly Jolly line and overstamped with a Fancy Pants writing acrylic stamp and edged with Adirondack inks: Oregano, Lettuce and Ginger.  The photo doesn't show it, but the Outlines Rubber stamp trees are all glistening from Sakura stardust pens. Have I mentioned before how much I love those pens? The presents are the circles that I cut away from the Outlines tree background and used a Fiskars punch and reassembled on a white base. Fiskars has some super cute Christmas ones this year.

I will spill the beans on which company when I hear from them---one way or the other.

Have been spending more time with my son. Hope to get some projects completed and posted in the next few days. All with lots of ink. I should change my name to inky fingers. Nah, too close to icky...lol.
Until then.

Tuesday, November 23, 2010

Trophy Card: Small


In an effort to stay true to my word, I am also posting the measurements for the small Trophy Card. If you have not seen the Vee-dio, I have inserted it at the end of this post.


So how is this card different from the Large one? Other than the size, the smaller card takes advantage of an 8 1/2 by 11 sheet of cardstock whereas the Large one requires a 12x12 sheet of cardstock.


Ready, set, and we are off. 


To get started you will need: A scorer, a craft knife, some cardstock, glue/adhesive and embellishments if desired.


First step is to prepare your base. Cut your 8 1/2 by 11 in half to get two 4 1/4" x 11 inch sheets.


Remove one inch from the short end to get a piece that is 4 1/4 x 10 inches.


You will place your score marks at 1"---2 1/2"---3 1/2"---5" ( which will be your cut line and leaving a half inch on both sides) 6 1/2"---7 1/2"----9"


Cut your slit at the 5 inch score line which should be the center of your card. Remember we took an inch off the short edge.


Reinforce your score marks starting with the score closest to the 5" cut. Do the second and third scores. Repeat on the other side.


At this point you can distress your edges if desired or use your decorative edge scissors to enhance the edges. You could also incorporate some of the paper edge punches that have become extremely popular.


Now we want to cut the mat pieces. Cut a sheet of 8 1/2 by 11 in half. You now have 4 1/4 x 11. Remove 1/4" from the long side so that your paper now measures 4 x 11".


Your mat pieces will be cut to 2 3/4 x 4" and two at 3/4 x 4". Remember your paper is already cut at 4" so just concentrate on cutting a 2 3/4" piece and two 3/4" pieces.


This will result in the following cut pieces:
  
You will then glue
your mats into place
on the panels. You
could also use some
decorative punches
to give them a bit
of pizzaz.

We are headed into home plate. Now that you have your mat panel pieces prepared, it is time to turn our attention to the card insert.


For this you will need another 8 1/2 by 11 sheet of paper. You will cut the paper in half to get two 4 1/4 x 11 sheets. You will need to remove 1 1/4 inch from the card on the short side. This will allow you to cut three equal strips of 3 1/4" x 4 1/4".
Decorate your card leaving a one inch border across the bottom.
Insert the card through the slit and adhere the base to the card.


Viola, another masterpiece. These would also make great place cards and/or party favors for a wedding party breakfast/luncheon or party. This is the kind of card that you will rarely find shoved into a drawer. It stands and delivers on its own.


Think about making one for your significant other to keep on his/her desk at work. With a cute photo of the two of you of course and maybe the date and the place where it was taken. It is a nice way of telling visitors and clients to back off without you having to be there. lol.

As I stated in the previous post, there is a Trophy Card re-loaded, so please stay tuned.
Until then.

Monday, November 22, 2010

Trophy Card: Large

Today is Monday, November 21, 2010, and I have been officially busted. So...way back a couple of summers ago, when I first started creating my Vee-dios, I promised to post the measurements for my large Trophy Card and the small one too. I never did. Please forgive me.

I had a viewer emailing saying that she'd tried to find that post and it was NO-WHERE to be found. When I went to look in unpublished posts, it was not there. Yikes.


I promised that I would get that information to her and here it is. Thanks, you know who you are, for asking. You can watch the Trophy Card Vee-dio at the end of this post. So here goes. You will need cardstock, Scor-Pal or trimmer that has a scorer, craft knife, glue and embellishments. Let's go have some fun.


To begin you will need a sheet of cardstock cut to 6x12. Make sure that you cut your sheet so that your folds will go with the grain. See my Vee-dio on paper cutting for more help: Learning Lab Episode 11 Technique: Paper Cutting.


Place your sheet on your scoring device and make the following score lines. 1 1/2"--- 3"--- 4 1/2"---6"---(6" will be a cut line leaving 1/2" to 3/4" uncut on both ends)---7 1/2"---9"---10 1/2"


Prior to creasing your folds you need to make your slit at the 6" mark leaving 1/2 inch to 3/4 inch on both ends. This will allow the slit to accommodate a 4x6 inch card.

Once you have scored all of your lines, make valley folds beginning with the the score line closest to the 6" cut line.


This will allow your creases to be made much easier and the paper is working with you and not against you as you make your way to the last fold line.

Turn to the other side and repeat. Your final scoring will look like this.


To ensure that your card is nicely lubricated, roll in the fold lines and your card should easily fold together. This is the bottom. The photo to the right is the top--the one with the slit. You have pretty much constructed your card at this point. If you want to decorate it, let's keep going.


Ok, call me a bit overzealous if you like, but I truly believe in waste not want not. Now this next part might be something that you already do or it never occurred to you. To minimize paper waste and extra cutting, I know that I want a 1/4" border all around my matting so I will cut my paper to size.  

I removed 1/4" from the long side of the paper. Since I started with a 6x12" sheet, this leaves me with a piece that is 5 3/4" x 12".

Now, I am ready to make three cuts. I want to remove 2 3/4 x 5 3/4" from that piece--this will cover the top panel, also cut two 1 1/4" x 5 3/4" pieces--these will fit the side panels. Since I have precut my paper to 5 3/4" I only need to foucs on the 2 3/4" cut and the two 1 1/4" cuts. 


Once all pieces have been cut you should have enough paper remaining in the correct dimensions to make another card.


I put this piece of Bazzill bling cardstock through with a cuttlebug folder and then used my brayer to ink the raised portions.  Adhere all of your decorative pieces to the three faces.


Next, you will need to reopen the slit at the top of the base. Turn it over and use your craft knife to do this.


Take your piece of 4x6 card and deocrate it as you please but leaving at least a 1 1/2" undecorated border. That leaves you a decorating space of 4 x 4 1/2". 


Now you are ready to place your card into the base.


Slide your card into the slit and place glue on the bottom inch only. Fasten it to the base and then repeat on the other side. Remember not to glue beyond 1 1/2 inches otherwise your adhesive will be exposed and cause the card to stick to itself. Fold down the flap and adhere. Repeat on the other side.


Once you have done this last step squeeze the base together and run your bone folder inside if necessary to make sure that the card is firmly attached to the base. Your results should be one of the cutest cards you have ever seen.


If you plan to use these for Christmas cards start with a collection of cardstock that complements each other.  The Holiday kit by Echo Park and available at CropChocolate.com is fabulous. Just make an assembly line for yourself. Decide which sheets will be cards and cut to 6x12 and then cut each strip into three pieces. Use one side for a typed or handwritten greeting and the other to showcase a small holiday photo of you and your family.They will be completed before you know it. Since everything starts out at 6x12" mix and mingle to your heart's desire.


I can guarantee that this one will have a permanent place on the mantle and will be brought out every year so don't forget to add the date.


Have loads of inky fun. Oh, by the way I do have a trophy card reloaded, so stay tuned.
Until then.


Wednesday, November 10, 2010

CropChocolate Online Crop: Challenge 6

Ok, I have to admit that this one was probably my favorite challenge. When I participate in these events, I want to produce something that I can use or send out to someone. The cards made in my Vee-dios are sent out to people, unless they go terribly awry, then I cut them up to make something else. 

This challenge was to create a Thankful Journal. You could make one of your own, directions were provided, or you could alter the front of your binder or notebook. I chose the latter. 

I purchased this black journal quite some time ago. Always with the intentions of enhancing it somehow. This crop challenge provided the perfect opportunity. 


The label is of the easy peel off variety. My hands were itching to remove it and get started. So first I pulled out a stash of potential materials to use.


I sat and stared at everything for a bit, wondering where to start. Then I remembered a layout by Sue Wilson that really appealed to me on some level. I took several of her elements and pulled them into my interpretation. I pulled out my Basic Grey Ambrosia paper pack and selected a few sheets, some stamp images, alphas, and sayings, Spellbinder dies and a few other things I thought I might press into service.


After much cutting, trimming and inking, I was left with this incredible journal in which to record my thoughts and actions on being thankful and showing my gratitude to those who help me.


All of the papers are from the Basic Grey Ambrosia collection. I just love the warmth of the colors in this line. It is reminiscent of India to me. The patterns are awesome and there is such a nice mix.

I used several Spellbinder dies: Beaded Ovald, Labels 10 and Labels One and the Classic Oval. I inked the edges of the dies with Distress Ink, dipped them in clear embossing powder and heat set the powder.
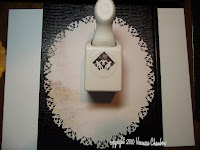
The large background oval was cut from a Fiskars large oval template. I used the Martha Stewart corner Family punch to go around the oval.


Once that was completed I pulled out a variety of Tim Holtz Distress Inks and used those to enhance the oval. I also used an Inque Boutique swirl stamp and used the Distress Inks with it. My son caused me to drop my ink pad on the oval, and I covered that with the Labels One Nestability die.


I used the Nestabilities as a template and traced the outside rim to get a smaller border around my pieces.


I stamped Be Thankful and Gratitude using an Inkadinkado harvest set. Embossed and heat set them and then went over them with my Sakura black gel pen. Will have to tell you the story about how I destroyed my embossing gun. Yep, melted that sucker right on down. But I digress. I glued the two pieces together using my ATG. At this point I used my Ranger white gel pen to place decorative dots around each cut's narrow frame.


The Bible quote was computer generated. I cut it using a Spellbinder Classic Oval die so that it would fit on top of the beaded oval die. I inked the inside edge with Tumbled Glass. I added some bling to the black beaded oval by 'painting' the beads with my embossing pen and then painting on some gold Pearl Ex powder. I did set the faux beads with a fixative.


At this point it was time to layer all of the pieces. The punched family went down first. Then I placed the Labels One die, then the Labels 10 die and finally the quoted piece. I thought about tying a ribbon and adding pearls or rhinestones or dew drops to the points between the family but opted not to do so. I like the look of this journal.


Yippee, got to use my inks. I am very thankful to Tim Holtz for dreaming of and then ultimately creating this wonderful line of inks.
In the name of love of course.
Until then.

P.S. The final challenge, #7, was hosted by Laura. You will have to return to see my take on her challenge project.