Showing posts with label Martha Stewart. Show all posts

Friday, January 7, 2011

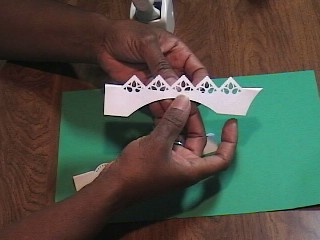
Corner Punched Borders

Hello again everyone. I promise that this might be my last punches post. I have gotten carried away with the concepts.  After filming the circle grid Vee-dio I used the scraps and started punching lines. 


 Here is the finished result.
When I saw what was resulting from it, I fell in love with my punches all over again.


 Below is a comparison of the regular border punch vs the corner  punch.


If you would like to see the brief Vee-dio, I have posted it here. 


This would look great on patterned paper also. Just think about all of those awesome lovingly inked edges. My only word of caution would be to ink the paper prior to punching. 

Until then.

Thursday, January 6, 2011

Those blasted punches again

I know, I know. I just cannot seem to let it go. Once I got started with the corner and border punches, I was like a dog with a bone. In my quest to punch the perfect circle I went searching for a template.******note the original template has been removed. Paprluvr on YT found this one. It is from Florida's Educational Technology Clearing house ******   I found this one at the CDC. My search also resulted in many illustrations of the Arctic Circle showing lines of latitude and longitude. This was perfect for what I wanted to do. After resizing the template using the format picture--I printed out a few copies on 8.5 x 11 paper.

The next thing was to place my circle on the grid to note the size. I punched a template for myself and noted the number of degrees it covered by pacing it on the cut circle's outer circumference. 

That determined how many times I could punch around the circle.


 I made about an inch and a half mark around the circle on the correct number of degrees and then punched. (Please forgive my typo that I did not catch!)


I was expecting great results but was still surprised with the outcome. Even the extra bits are symmetrical.


I am sure other corner punches would work just as well. So long as you are able to see through the punch for alignment.

Here are a few more stills of my punches.

If you have not seen the Vee-dio; you can watch it here.

Don't forget to pull out your stamps and ink and shade with love to your heart's desire. Until then.

Thursday, December 30, 2010

Happy Almost New Year's Eve

Can you believe that we are just a few days away from 2011? Ouch, kinda hurts to type that. The years are zooming past. I think I want time to move a little slower or somehow add more hours to the day. How about a thirty hour day? I would LOVE that. Now, that would make the years move a bit slower.

I am pretty sure you are not impressed by my time challenges since we all face them. I do have something that just might impress you, and it is the Martha Stewart corner and border punches--but used on circles and ovals.  Now I can have more than four shapes on a piece. Yippee!!!

Here is a quick look at what I was able to accomplish using just a corner punch. 


Family


You can see the complete Vee-dio here. Caution, it is LONG, but I did cut out about 10 minutes worth. lol


For your enjoyment I have also posted a tutorial on using the border punches and making small snips to place them on an arc --Circles and Ovals--which results in breathtaking pieces. Vee-dio below these pics. Just a bit shorter but not by much.

Tulips
Double Arches


I know that 2011 will bring new and exciting changes and challenges to our lives. Hold tight to your faith. I don’t know how people who do not believe in a power higher than themselves manage. It is ONLY through the grace of God, that I am lucid and able to function on a daily basis. It is not my purpose to preach to you or anyone else, this is an expression of my faith in God. The Bible says that if we don’t spread the Good News and acknowledge God, the very rocks will cry out.  Luke 19:40.  I am not giving the rocks a chance.

Thank you for stopping by. Although the tutorials were about the punches, you know I had to throw in a bit of ink. Love the Tim Holtz Distress ones.

Until then.

Sunday, November 28, 2010

It's beginning to look a lot like Winter

Ha, ha, ha. I know you were expecting to read, Christmas. I must admit, it is beginning to resemble that time of the year. Especially since my tree is up and decorated. No presents as of yet. Just to keep myself in the mood, I am posting a card I did for our November Challenge and a submission entry for a design team call. 


Without further ado, here is the card:
Merry Christmas, Deer

This card was created using the deer cut at 3 inches (images 3& 4) from the Christmas Solutions cart, Martha Stewart snowflake punch--Echo Park Christmas pack, and the Spellbinder Beaded oval die--also Echo Park paper. Red pearls are Kaiser Kraft. The creamy ones, not sure, but their quality is not that great. Might have grabbed them from a discount barrel. You get what you pay for. Antlers and hooves are colored using a Sakura metallic brown pen. Spritzed the card with Peach Delights Glimmer Mist and the label with Red Velvet Glimmer Mist. The stamp is Studio G stamped with black ink and embossed. I know I could have jazzed this up with lots of other embellishments, but kinda like the simplicity. And from another angle.

Merry Christmas, Deer


And then last but not least is a layout I submitted as one of my design team entries. I think I submitted four in all.

The base paper is Fancy Pants  Spring Fling (circles) and Holly Jolly (green) with the ivy embossed panel done with a Sizzix plate and brought out with the Shabby Shutters and Chipped Sapphire Distress Inks. Also used the Martha Stewart deep edge Presents punch. I know I said to someone else that I did not need this one since I had the smaller version. Famous last words. The Looky, Looky was done on the computer using the Snowdrift font. The circles (Spellbinder) are Fancy Pants Holly Jolly line and overstamped with a Fancy Pants writing acrylic stamp and edged with Adirondack inks: Oregano, Lettuce and Ginger.  The photo doesn't show it, but the Outlines Rubber stamp trees are all glistening from Sakura stardust pens. Have I mentioned before how much I love those pens? The presents are the circles that I cut away from the Outlines tree background and used a Fiskars punch and reassembled on a white base. Fiskars has some super cute Christmas ones this year.

I will spill the beans on which company when I hear from them---one way or the other.

Have been spending more time with my son. Hope to get some projects completed and posted in the next few days. All with lots of ink. I should change my name to inky fingers. Nah, too close to icky...lol.
Until then.

Wednesday, November 10, 2010

CropChocolate Online Crop: Challenge 6

Ok, I have to admit that this one was probably my favorite challenge. When I participate in these events, I want to produce something that I can use or send out to someone. The cards made in my Vee-dios are sent out to people, unless they go terribly awry, then I cut them up to make something else. 

This challenge was to create a Thankful Journal. You could make one of your own, directions were provided, or you could alter the front of your binder or notebook. I chose the latter. 

I purchased this black journal quite some time ago. Always with the intentions of enhancing it somehow. This crop challenge provided the perfect opportunity. 


The label is of the easy peel off variety. My hands were itching to remove it and get started. So first I pulled out a stash of potential materials to use.


I sat and stared at everything for a bit, wondering where to start. Then I remembered a layout by Sue Wilson that really appealed to me on some level. I took several of her elements and pulled them into my interpretation. I pulled out my Basic Grey Ambrosia paper pack and selected a few sheets, some stamp images, alphas, and sayings, Spellbinder dies and a few other things I thought I might press into service.


After much cutting, trimming and inking, I was left with this incredible journal in which to record my thoughts and actions on being thankful and showing my gratitude to those who help me.


All of the papers are from the Basic Grey Ambrosia collection. I just love the warmth of the colors in this line. It is reminiscent of India to me. The patterns are awesome and there is such a nice mix.

I used several Spellbinder dies: Beaded Ovald, Labels 10 and Labels One and the Classic Oval. I inked the edges of the dies with Distress Ink, dipped them in clear embossing powder and heat set the powder.
The large background oval was cut from a Fiskars large oval template. I used the Martha Stewart corner Family punch to go around the oval.


Once that was completed I pulled out a variety of Tim Holtz Distress Inks and used those to enhance the oval. I also used an Inque Boutique swirl stamp and used the Distress Inks with it. My son caused me to drop my ink pad on the oval, and I covered that with the Labels One Nestability die.


I used the Nestabilities as a template and traced the outside rim to get a smaller border around my pieces.


I stamped Be Thankful and Gratitude using an Inkadinkado harvest set. Embossed and heat set them and then went over them with my Sakura black gel pen. Will have to tell you the story about how I destroyed my embossing gun. Yep, melted that sucker right on down. But I digress. I glued the two pieces together using my ATG. At this point I used my Ranger white gel pen to place decorative dots around each cut's narrow frame.


The Bible quote was computer generated. I cut it using a Spellbinder Classic Oval die so that it would fit on top of the beaded oval die. I inked the inside edge with Tumbled Glass. I added some bling to the black beaded oval by 'painting' the beads with my embossing pen and then painting on some gold Pearl Ex powder. I did set the faux beads with a fixative.


At this point it was time to layer all of the pieces. The punched family went down first. Then I placed the Labels One die, then the Labels 10 die and finally the quoted piece. I thought about tying a ribbon and adding pearls or rhinestones or dew drops to the points between the family but opted not to do so. I like the look of this journal.


Yippee, got to use my inks. I am very thankful to Tim Holtz for dreaming of and then ultimately creating this wonderful line of inks.
In the name of love of course.
Until then.

P.S. The final challenge, #7, was hosted by Laura. You will have to return to see my take on her challenge project.